Any self respecting autonomous robot needs a remote control. If you want to use an iPhone as your controller then Bluetooth is one of the better communication options for directing your robot / drone / whatever.
This app has been designed to work with the Romeo BLE and Bluno boards from DFRobot. The Bluno is a combination of an Arduino and a Bluetooth shield. It uses Bluetooth Low Energy (BLE), which is compatible with iOS 7.0+ devices: iPhone 5+,iPad 3+,iPad Mini,and iPod 5th Gen (note that Bluetooth LE capability is required).
Getting Started: The Connection Screen.
When the app starts, it will open the connection tab and display any compatible BLE devices which are within range. To connect to a device just tap on its name. If the connection is successful, the word connected will be displayed and the communication indicator "LEDs" will turn from flashing blue to green. You can start a manual search for BLE devices by tapping the search (magnifying glass) icon in the top right of the connection screen. You can stop the search by tapping the disconnect device button (a cross) in the top left.
If you are already connected to a BLE device, tapping the disconnect device button will disconnect you. You can only attach to one BLE device at a time.
Setting a Task:
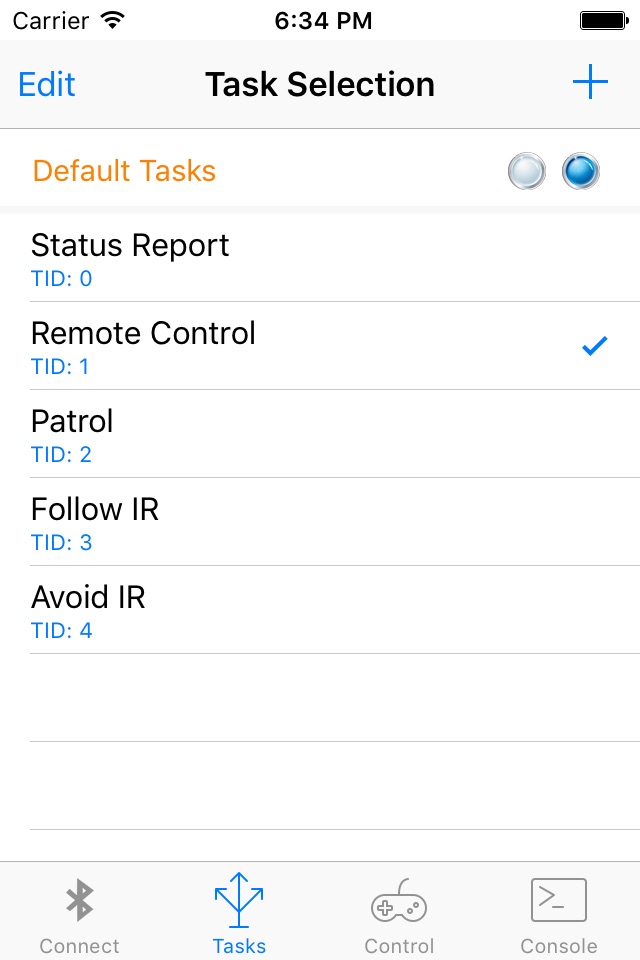
The Task tab allows you to send a tasking message to your Bluno. Tapping a task will transmit the tasking ID (e.g. 1) via Bluetooth. Tap the add button (+) to add your own tasks. Tap Edit to delete or rearrange the tasks. Tapping "Default Tasks" will reload the task list that comes with the app.
Controlling your BLE Device:
The Control tab acts as a virtual gamepad for your BLE device. The currently selected task is displayed at the top of the screen.
Tapping the function keys (F1 to F4) will send the designated character via Bluetooth to your BLE Device. The function keys will also adjust the speed. F1 = 25%, F2 = 50%, F3 = 75% and F4 = 100%. The speed is sent automatically.
Similarly, tapping the directional dPad or stop button will send the character assigned to those buttons. You can change the characters which are transmitted from the key mapping option in the console tab. The default mappings are:
F1 w
F2 x
F3 y
F4 z
Up Arrow f
Down Arrow b
Left Arrow l
Right Arrow r
Stop s
The speed slider will send the selected speed in the following format:
- start byte: ! // Which indicates that the next byte is speed
- speed byte // encoded as an unsigned char (0-255). We are using 0 - 100.
Messages received from the BLE device are displayed at the bottom of the screen.
The Console:
The console tab allows you to send any character strings that you wish to the Bluno / Romeo. Just type the message in the text field and tap Send. Any received messages will be displayed below.
The console tab also contains the system log which records various events, such as device discovery, connection, data transmission and disconnection. You can email the system log by tapping the mail button in the top right of the screen.
Tap the settings (gear icon) button if you wish to change the keys mapped to the Control buttons.
Romeo / Bluno Code:
Sample code to allow you to test the app is available from the Reefwing Gist Repository (https://gist.github.com/reefwing/b6b51197ffe1b238fdbfc558a0c26e56).
A full description of how to set up the hardware and software may be found at the Reefwing Robotics Blog (http://reefwingrobotics.blogspot.com.au/).
Notes:
With a Romeo BLE mounted on the DFRobot Devastator Tank mobility platform I noticed that at full speed the Romeo would sometimes reboot due to excessive current draw on the batteries. If you are losing the BLE link you should check whether this is happening to you. It is hard to pick up as the boards reboot so quickly.
Further Information:
You can get further information and support for this app at the Reefwing Robotics Blog (http://reefwingrobotics.blogspot.com.au/).


